
EPOXY SETTING TIPS FOR BRIOLETTES
WARNING: To avoid breakage, beware not to force too large a pin into the small drill hole; measure the pin accurately before inserting it into the briolette. All Rough and Ready drilled briolettes come with the hole diameter specified.
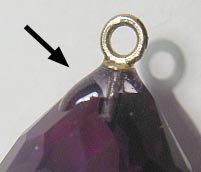
1) When adhering a setting pin into a drilled briolette good pin design and construction will make for stronger settings. Ultrasonically drilled holes have a slight taper narrowing towards the bottom of the hole. The pin should be shaped to fit all the way to the bottom of the hole to maximize setting strength. It may be necessary to slightly taper the pin in order to fit properly. You will obtain stronger pin settings if there is a small "face-cap" soldered to the top of the pin which matches the shape and is adhered to the top face of the briolette where the hole entry is. This increases bonded surface area and gives better lateral stability to the pin thus increasing the strength of the setting. It looks better too. Damage to set briolettes can be decreased by placing a jump ring hinge or swivel directly above the hole where the setting pin enters the briolette. This will prevent leveraged stress from breaking the briolette in the area surrounding the pin. A design with a long rigid attachment protruding from the briolette's drilled hole will greatly increase the chances of breakage. The Stuller pearl bail (item #29 and larger #30, page 343, volume 21, in their "Findings Book") have the "hinge" and "face" cap which can be adjusted and sized to each briolette in minimal time. These two products work very well with our briolettes which have been drilled with a "blind" vertical hole.
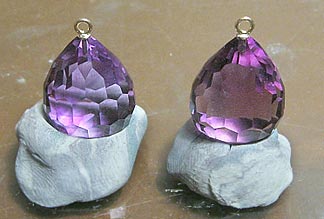
Plastalina modeling clay holds
two briolettes while the
adhesive cures.
2) Clean briolette and cap or pin-cap in warm soapy (Ivory Liquid dish soap) water, next rinse in warm water, then rinse again with denatured ethanol alcohol or acetone. Do not use rubbing alcohol since many contain oils. Do not touch or contaminate the surfaces before adhesion. (Drill holes come precleaned.)
3) Mix epoxy thoroughly and use enough epoxy to avoid improper proportions. Improper proportions are more likely when mixing small amounts. To prevent the catalyzer from being absorbed only mix epoxy on nonabsorptive surfaces such as aluminum foil or glass. For best results, discard the first epoxy resins out of the tube, as they may be contaminated, and avoid mixing in air bubbles that can show in the finished piece. Epoxy is cheap; it's better to waste a little and achieve superior results.
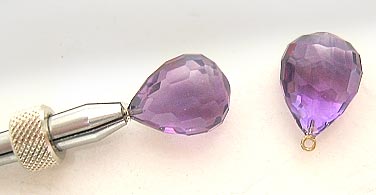
Pin-cap briolette assembly
with excess cured adhesive
to be removed.
4) Do not worry about a little excess epoxy oozing from the joint: this will actually give the best results since it fills any gaps between the jewelry metal and the briolette, making gaps less noticeable, and the excess epoxy is easy to remove with a sharp razor blade after it has cured. The stones will not be damaged as they are very hard, and with care it will not damage the jewelry metal either. A quick wipe with denatured alcohol or acetone will remove any cured epoxy residue from the briolette surface.
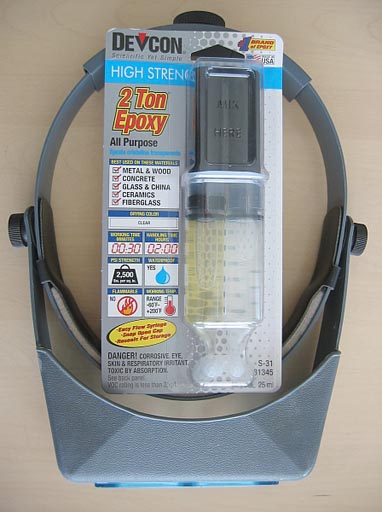
5) The strongest epoxies are the most brittle. Some epoxies are very pliable when cured and allow for too much movement and flex in the adhered juncture. My preference is for the hard curing type with little flexibility. These hard epoxies offer the highest tensile strength. Devcon 2-TON Epoxy S-31 is an excellent choice as demonstrated in the "strength tests".
Pin vice holding briolette / pin-cap assembly.
6) If using a conical cap, good fit with minimal clearances between the pieces to be adhered will give your best results. Epoxies are capable of filling gaps up to 0.040", but a smaller gap is better. Tight joints will also make it easier to assembly and adhere the pieces where you want them. In other words, you won't get crooked briolette-cap assemblies. For an excellent fit check out our complimentary, 6 angles of blank briolette cap waxes. They are designed to aid in briolette-to-cap settings with the ability to incorporate your own unique designs and styles.
7) Select which briolette side should face forward. Face the best side where you want it. Also, since many gem materials are dichroic, mark briolettes prior to adhesion as to the direction preference in the finished piece. This will prevent you from having one blue and one purple tanzanite earring, for example.
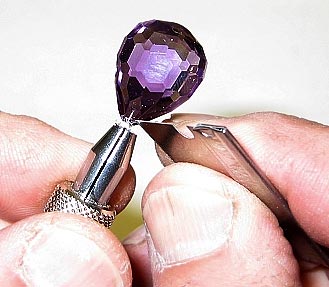
Removing excess adhesive from
briolette pin-cap assembly.
8) Wet both surfaces, briolette and pin-cap, with the mixed epoxy. Apply mixed epoxy to both briolette and cap or pin. When using a drilled briolette, fill the hole with mixed epoxy. Work any bubbles out of the drill hole with an appropriate size small wire. Bubbles in the epoxy may be noticeable in the finished piece; use pins which go all the way to the bottom of the hole to avoid this problem. Be careful to avoid smearing metal on the hole walls - this may also be noticeable in the finished piece.
I hope these tips save you time and improve your product.
Steve Green

Some tools used for fitting pin-caps to briolettes.
Plastalina modeling clay to hold briolette pin-cap assembly vertical while adhesive is curing.
Pin vice, small flat file, tweezers, pliers and cutter to aid in adjustment and fitting of the pin-cap to briolette hole.
Vernier to accurately measure pin diameter.
Wire or pin to aid application of mixed epoxy into the hole of the briolette. Make sure this pin or wire is of a size smaller than the drilled hole in the briolette.
Razor blade to remove excess epoxy on the briolette after it has cured. This is done while holding the briolette pin cap assembly in the pin vice.
The Optivisor magnifier makes the small scale work easier to see.
Recommended Devcon 2-Ton Epoxy is available from Rough and Ready Gems.